
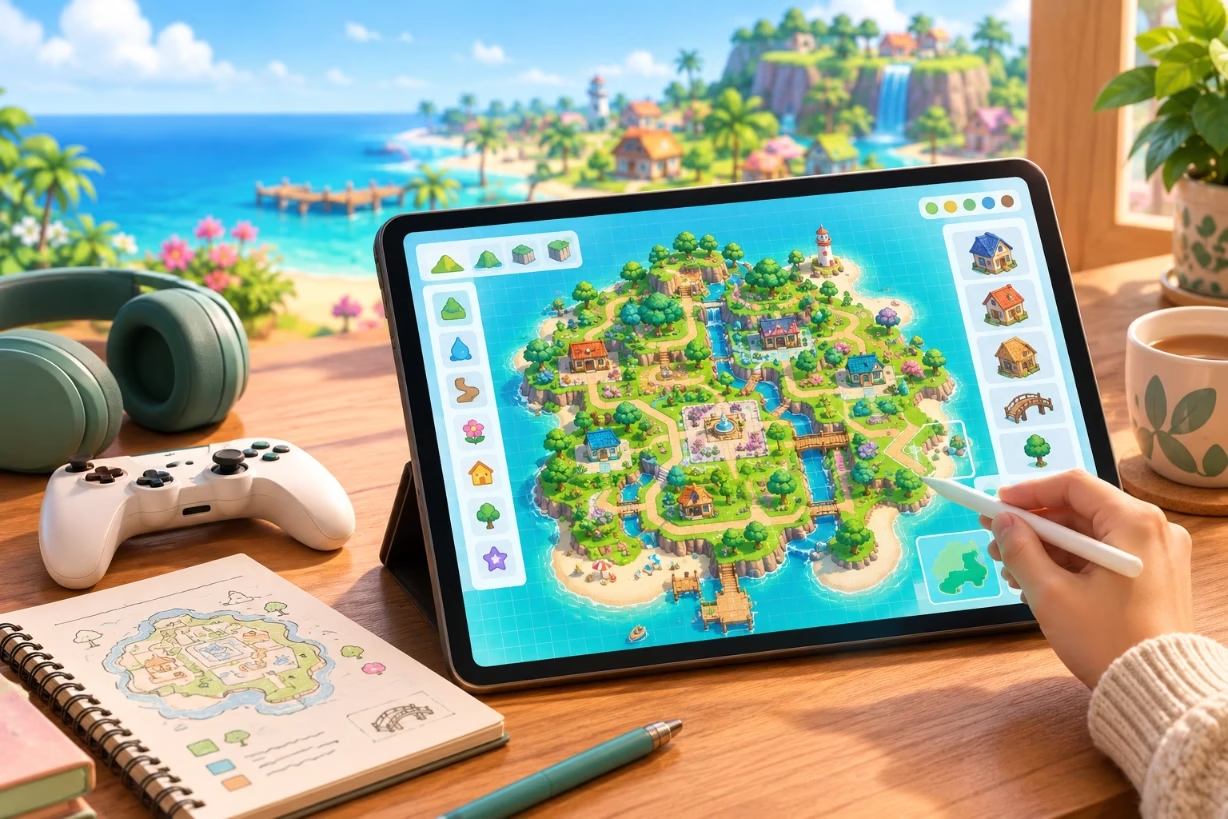
To use happy island designer for your town, you open the tool in a browser, pick your map size, lay out cliffs, rivers, paths, and buildings on a grid, then export or screenshot the design so you can rebuild it step by step inside Animal Crossing: New Horizons on your Nintendo Switch.
Why I Still Use Happy Island Designer Before I Touch My In Game Town
When I first started planning my town in Animal Crossing, I kept flattening land, moving rivers, and regretting every single change. That is when I found happy island designer. Instead of messing up my real island, I could try wild ideas on a simple grid, make ugly mistakes, and fix them in seconds. I want to walk you through how I use happy island designer today so you can plan a calm, cozy, and smart town layout without wasting hours of in game time or piles of bells.
What Is Happy Island Designer And Why It Helps So Much
Happy island designer is a fan made browser map editor for Animal Crossing: New Horizons. It gives you a big grid that matches your in game island. You place rivers, cliffs, bridges, inclines, buildings, paths, and decorations with simple tools. You see the whole town from above like a blueprint. This means you can test layouts before you spend a single second on in game terraforming.
In the real game, moving one house takes a full in game day and a bunch of bells. Digging a river the wrong way or flattening a cliff can take a long time to undo. With happy island designer, you drag, erase, move, and rotate almost anything in seconds. I treat happy island designer like photoshop for my town plans. I never commit big changes on my Switch until they feel right on the planner.
Getting Started With Happy Island Designer In Your Browser
You do not have to install anything to try happy island designer. You just open it in a modern browser on your computer, tablet, or even a big phone. I prefer a laptop or desktop, because the bigger screen makes it easier to see details like path tiles and building spacing.
Step 1: Choose Your Island Size And Layout Style
When you first load happy island designer, the screen shows a blank grid with simple tools along the edges. The grid lines match tiles in Animal Crossing. At the start, pick the right map size for your game. Most people leave the default size, since it matches a standard New Horizons island. You do not need to be perfect to the last tile here, but try to keep the scale close, because it affects how much space you feel you have later.
Some versions of happy island designer also let you pick a base layout that looks like the original island shapes from the game, with basic rivers and the mouth to the sea. I like to start with my rough in game layout already there, then I edit it to match my current save file.
Step 2: Rough In Your Real Island As It Exists Today
Before I plan anything new, I use happy island designer to sketch the island as it really is now. I add my river shapes, cliffs, resident services, airport, plaza, shops, museum, and villagers’ homes. I do not worry about every tree or path yet. I just want a honest snapshot of the town.
This step matters more than people think. Once you map your actual town into happy island designer, you can see awkward spaces, long empty strips, and cramped areas around buildings. Many times I spot problems I never noticed while walking in game, because the zoomed out view tells the truth.
Using Happy Island Designer Tools To Shape Rivers And Cliffs
One of the main reasons players load happy island designer is river and cliff planning. Both of those are slow and painful to redo on the Switch, so I always perfect them on the map planner first.
Drawing Natural Looking Rivers
In happy island designer, pick the water tool. You can usually click and drag to paint river tiles, or use straight line tools for neat edges. When I started, I drew rivers as straight lines. They looked stiff and fake. Now I work in small curves, one or two tiles at a time, and I vary the width so the river feels more organic.
Here is how I keep rivers realistic in happy island designer:
- I avoid long dead straight sections; I add small bends and turns.
- I widen rivers near waterfalls or the sea so they feel more open.
- I keep at least three tiles of land between a river and a cliff so I have space for paths and trees.
- I lower or raise land around river crossings before I place bridges, so the style of bridge makes sense later.
Because happy island designer lets you zoom out, you can tell right away if the flow of the water looks gentle or chaotic. If something feels wrong, you erase a few tiles and try again. On my first serious layout, I redid my main river five times on happy island designer. That would have taken weeks in game.
Shaping Cliffs For Drama And Easy Movement
Cliffs control your sense of height and depth. They also control how annoying it feels to walk around town. In happy island designer, the cliff tool lets you pull out big blocks of raised land or carve them back down in seconds.
When I use happy island designer for cliffs, I ask myself two questions. Where do I want drama, like big waterfalls or lookout spots. And where do I need open, flat land for simple, calm walking. I try to stack most tall cliffs in one or two key areas. That gives your town a clear theme without turning the whole island into a maze.
On the planner, I drop small stair shapes in likely incline spots before I even place the actual incline items. I make sure each level has enough space right at the top and bottom for paths and decoration. Because happy island designer has a clear tile grid, I can count exact tiles to fit custom patterns later.
Placing Buildings And Key Facilities In Happy Island Designer
Once you like the bones of your rivers and cliffs, you are ready to move big structures. Happy island designer shines here, because you can drag buildings, swap them, and try wild positions without paying one bell.
Finding A Good Spot For Resident Services And The Plaza
You cannot move resident services in game, but you still need to plan paths and views around it. In happy island designer, I mark resident services clearly, then think about how players walk out of the airport and approach the plaza. I test different patterns that lead the eye in a gentle curve instead of a straight line. I leave enough open space around the plaza for seasonal decorations and event booths.
Setting Up Nook’s Cranny, Able Sisters, And The Museum
For shops and the museum, happy island designer helps me group or separate them by theme. Sometimes I place Nook’s Cranny and Able Sisters side by side like a small town square, with the museum on a higher cliff behind them. Other times I push the museum into a quiet forest corner. I test both setups on happy island designer by moving the icons around and checking how long it feels to walk between stops.
One rule I follow: I always leave at least three tiles in front of any building door for path and decor. On the planner, I draw these tiles as paths or plaza style ground, so I remember later. The grid in happy island designer makes it easy to see if I am cutting it too close to a cliff edge or a river bank.
Arranging Villager Homes With Personality
Villager yards are where you can really show style. On happy island designer, I usually plan one of three layouts: a tight neighborhood, scattered cottages, or themed streets. I test each style quickly by copying and pasting house icons.
For a neighborhood, I line houses in two or three rows with alleys between them. For cottages, I spread houses along curves in the river or around a forest clearing. For themed streets, I group villagers who match a certain mood, like sporty, spooky, or fancy.
As I drag houses around happy island designer, I watch for even spacing so every yard gets a fair amount of land. I also check the walking flow. I do not want visitors stuck weaving through tiny chokepoints. The top down view makes those problems very obvious.
Using Happy Island Designer To Plan Paths, Bridges, And Inclines
Paths, bridges, and inclines turn a nice layout into a smooth, usable town. Happy island designer lets you draw paths in many different styles and place fake bridge and incline markers so you can see your travel routes.
Drawing Path Networks That Actually Match Your Walking Habits
I never draw paths as perfect straight lines from building to building. Instead, I think about where my character really walks. Happy island designer helps here, because I can sketch rough curves that cut across patches of land in natural ways.
On the planner, I mix wide “main roads” with narrow side paths. I keep main roads at least three tiles wide. Side paths can be one or two tiles, just enough for one player to walk. I also leave some routes path free, only marked with occasional stepping stone tiles. In happy island designer, I color these differently so they are still visible on the map.
Testing Bridge And Incline Placement Before You Spend Bells
Bridges and inclines are expensive in game, and you are limited in how many you can place. With happy island designer, I test different spots until both the look and function feel right.
When you drop a bridge on your planning map, make sure the river is straight and the banks are aligned. I check both ends of the bridge to confirm there is room for path tiles and maybe a tree or lamp. For inclines, I ensure there is room at the top and bottom to step off without bumping into a wall or cliff right away.
On my current map, happy island designer helped me realize that moving one incline just two tiles to the left made a huge difference in how easily I could reach a high area without awkward turns. I would never have noticed that without the planner view.
Adding The Small Details: Trees, Flowers, And Decor On The Planner
Once the big parts of your town look solid on happy island designer, you can layer in details. Some versions of the tool let you mark trees, bushes, flowers, fences, and even furniture icons. You do not need to mark every single item, but I find it helpful to block out zones.
Planning Forests, Orchards, And Scenic Spots
In happy island designer, I pick a tree symbol and tap it quickly to mark rough forests. I like to work in irregular clusters, avoiding perfect rows unless I am drawing an orchard. For orchards, I lay down straight, clean lines so it feels easy to harvest fruit.
For scenic spots, like a picnic area or a zen garden, I mark a patch of ground with a different color or pattern. That reminds me to come back later and fill it with matching items in game.
Mapping Flower Beds And Breeding Areas
Flowers can get messy fast. On happy island designer, I mark breeding spots in neat grids far away from main walkways. I also plan decorative beds near houses, bridges, and plazas. By blocking these on the map, I avoid planting random flowers all over the island, which can make the town look noisy.
Turning Your Happy Island Designer Plan Into Your Real Town
After you finish your layout in happy island designer, you need a simple way to follow it on your Switch. I usually do three things: export, print or save, and then rebuild step by step.
Exporting Or Screenshotting Your Happy Island Designer Map
Most versions of happy island designer have an export or save image button. I click that and save a high resolution picture of my map. If the planner does not have this, I take a full screen screenshot instead.
I keep that image on my phone or tablet so I can view it while I sit with my Switch. Sometimes I also print the map and keep it beside me, because flipping between screens gets old during long terraforming sessions.
Rebuilding Your Island In Logical Phases
Trying to rebuild your entire island at once is stressful. I always break the plan from happy island designer into clear phases. For example:
- Phase one: reshape the main river and cliff area.
- Phase two: move shops and the museum.
- Phase three: redo villager housing district.
- Phase four: paths, trees, and final decor.
I cross off each phase on paper as I finish it. Because I have the happy island designer map in front of me, I do not forget where new bridges go or which cliff edges should be straight or curved. This keeps the in game work calm and focused, instead of random.
Common Mistakes People Make When Using Happy Island Designer
Even with a planner, there are a few traps I see again and again. I made most of these myself when I first used happy island designer, so I want to point them out.
Planning With No Room For Trees Or Fences
One mistake is filling every tile with paths and buildings. It looks clean on happy island designer but cramped in game. Always leave some tile gaps for trees, bushes, fences, and outdoor items. On the planner, I mark a few empty tiles beside each major path as “green space” so I remember to keep things breathable.
Ignoring Elevation And Camera Angles
Happy island designer shows everything from above, but the game camera is closer and tilted. Tight cliff corners that seem fine on the planner can feel blind or blocked when you walk with the in game camera. I now avoid tiny terraces or very narrow high paths unless I truly want a hidden area.
Making Travel Routes Too Long And Winding
A twisty river and zigzag paths can look pretty on the map, yet feel exhausting day to day. In happy island designer, trace the route from your house to key spots like Nook’s Cranny, the museum, and your favorite farm or beach. If the path snakes more than it needs to, simplify it before you start building in game.
Tips To Get More Out Of Happy Island Designer Over Time
Happy island designer is not only for one big redesign. I use it as an ongoing planning journal for my island. Here is how I keep getting value from it month after month.
Save Multiple Versions Of Your Map
Whenever I think about a new theme, like turning part of my town into a farm core or city core area, I open happy island designer and save a new version. I keep old versions too, so if a new idea feels wrong, I can go back. This makes experimenting low risk and fun.
Treat The Map Like A Mood Board
Sometimes, I copy my happy island designer map into a drawing or notes app and add pictures alongside it. I paste screenshots of custom designs, items, or dream addresses that inspire me. The layout from happy island designer stays at the center, and the images around it guide my decor choices.
Use Happy Island Designer To Share Ideas With Friends
If you like talking about town layouts with other players, happy island designer makes that easy. You can share your exported map with friends and ask for feedback. Some people even trade map files or challenge each other to design certain themes using happy island designer as the base tool.
Why Happy Island Designer Still Matters Even Late In The Game’s Life
Many people play Animal Crossing for years. Over time, your taste changes. Maybe you start with cute pastel paths and later want a calm natural forest style. Each time your mood shifts, happy island designer gives you a safe space to rethink your island without destroying what you already built.
For me, happy island designer has become part of my regular play cycle. I play casually on my Switch, notice parts of town that feel off, then later sit at my computer and try fixes on the planner. The loop between the game and happy island designer keeps my island feeling fresh without random bulldozing.
If you treat happy island designer as your quiet planning desk for island life, you will save time, protect your bells, and end up with a town layout that fits how you really like to walk, decorate, and share your world.